Archives
Contribute
|
|
5 Yoga Poses To Strengthen Your Back
|
|
Ritu Kapur
12/03/2019
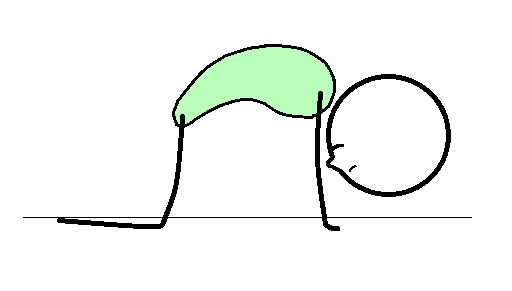
In my previous article, I shared 5 yoga poses to relieve lower back pain. In this article, I would like to share some poses that can help you strengthen your back. Strengthening the muscles that support your spine is a process that involves strengthening the abdominal muscles of your core as well. Since these muscles are located opposite of each other, if one group of muscles is slacking, the other group has to pick up the brunt. If you are not using your core properly, your lower back is taking a lot of burden to support you throughout the day. A yoga routine for lower back focuses on opening up the hip muscles as well since any tightness in the hips can affect your lower back and vice-versa. Here are 5 poses that will help you strengthen your lower back. Go through a regular routine of these poses and you should be well on your way to giving your body the support it needs. Add the 5 poses from my previous article to your routine to relax your back either before or after this sequence. 1.Cat and Cow Sequence - Start on your hands and knees. Aim to make a “tabletop†with your back, starting with your back as flat as possible.
- Inhale: Lift your tailbone and lengthen your spine forward, opening your shoulders and looking ahead.
- Exhale: Tuck your tailbone and try to arch your back towards the ceiling, looking in towards the naval, like a cat stretching.
- Cat- Cow Pose is done in a continuous loop to build flexibility and strength in the lower back. Repeat this 5 times in coordination with your breath.
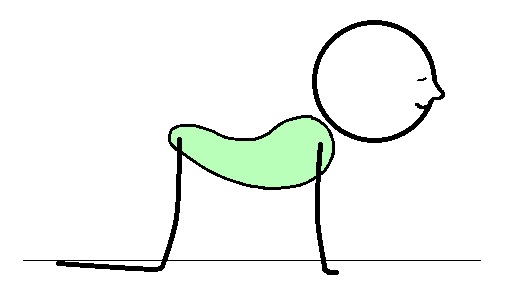
2. Cobra Pose - After Cat-Cow sequence, lie down on your belly with your head resting on your hands for 1-2 minutes. Then lift your head up and bring your hands by your side.
- Make sure your legs are right next to each other with your gluteus or your buttocks squeezed together.
- As you inhale, use the strength in your upper chest to lift the head and shoulders off the floor. Make sure your neck is in a comfortable place, neither looking too far up or down.
- You can stay in Cobra pose for 3-5 breaths. If it’s difficult to stay there, you can go back down as you exhale and then come up as you inhale. Do this transition slowly 5 times in coordination with your breath.
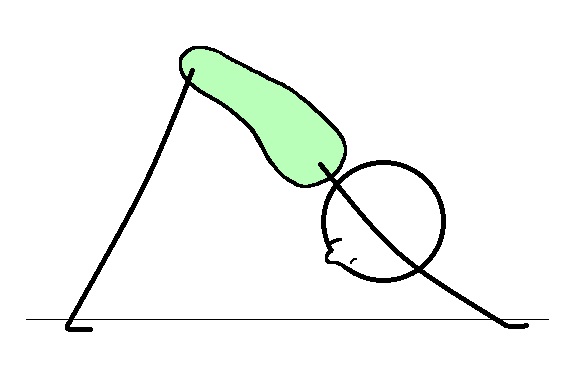
3. Downward-facing Dog This is a very common yoga pose but it’s not easy to achieve the perfect alignment it requires. Once you do, it will quickly become your favorite yoga pose. A couple of things that you want to ensure in this pose is that your shoulder blades and your core are both engaged. - Start on your hands and knees. Walk your hands slightly ahead of your shoulders and as you press into your hands, engage your shoulder blades. Tuck your toes under and lift your knees off the mat using your core strength.
- Bring your head in between the arms as your hips go back and up. In the beginning, your heels may not touch the ground due to tight hamstrings (the back of your thighs) which is very common. You can “walk the dog†by bending right knee and pressing the left heel towards the ground and taking a deep breath. Switch to the other side. This allows you to stretch one leg at a time.
- You can stay in this pose for 3-5 breaths. When you need to come down, do a slow transition back to hands and knees. You can do some gentle stretches for both wrists after.
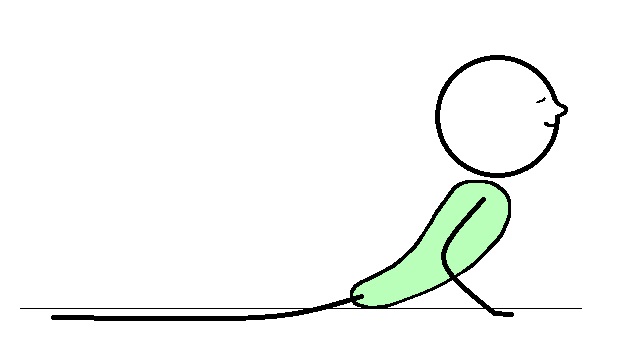
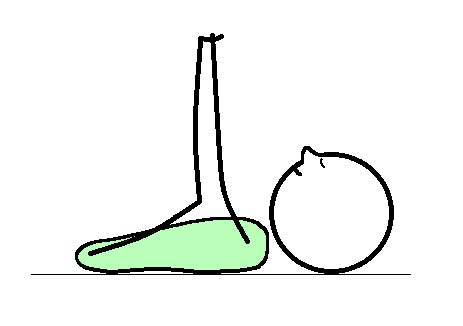
4. Happy Baby Pose As the name suggests, it’s a very happy pose 😊. After the downward facing dog, lie down on your back and bring your knees to your chest. This will gently relax all the muscles that you stretched with this pose. Take a few deep breaths. - Start with your knees towards your chest, open your knees wide and bring your arms inside the knees.
- Reach for your ankles or your feet and spread them apart. Make sure that the ankles are aligned with the knees.
- Feel your tailbone resting on the ground. This is a great pose to stretch and open the hip muscles which in turn helps the spine.
- Don’t forget to keep a big smile on your face. You can stay still or gently rock side-to-side. After 3-5 breaths, bring your hands down to your knees and rest your feet on the ground with your knees bent. Take a few resting breaths here in this Partial Recline pose (see the previous article)
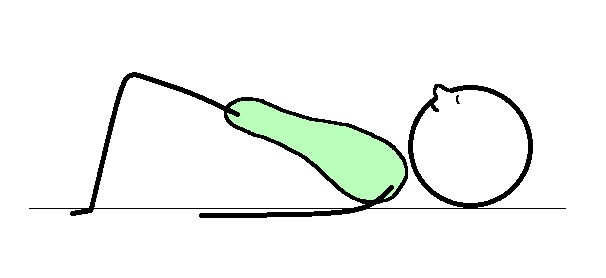
5. Bridge Pose - After resting in Partial Recline position, make sure that your feet are hip width apart. Press into the feet and as you inhale and lift your hips off the ground just 1-2 inches. Exhale and release them back on the ground.
- With your next inhale, lift your hips up higher so that your lower rib cage comes off the ground. Exhale and release them back to the ground.
- With your next inhale, take the hips up even higher so that your whole rib cage goes off the mat. You are in a full Bridge Pose now. You can squeeze your gluteus or your buttocks to find the strength to stay there for 3-5 breaths.
- Notice the weight at the back of your shoulders and notice the opening of the upper chest as you stay in the bridge pose for a few deep breaths.
- When you are ready to come down, always do it very slowly, bringing each vertebrae down slowly. Once your hips are fully down, brings your knees to your chest, rock side to side a few times and allow yourself to completely rest in Shavasana (see the previous article for Shavasana).
These poses will work great when incorporated into a routine with the 5 poses that I discussed in my previous article to relieve lower back pain. When you are ready to get up, gently roll over onto your side and stay there for a short time. Press your weight onto both, the elbow of the side you are on and the hand of the opposite arm and slowly raise yourself about halfway, letting your spine and neck hang gently for a bit before slowly continuing to come up to a full and comfortable seated position. You can sit tall and meditate on your breath for 3-5 minutes. The whole practice can be done in 10-20 minutes depending on how long you stay in each pose. Feel free to reach me with any questions. Check with your health care practitioner before you follow this routine. Wishing you the best of Health, Namaste! Ritu Kapur is the owner of Sohum Yoga and Meditation Studio in Westborough, MA. She has been working as an occupational therapist with different age groups for over 20 years and is a Registered Yoga teacher. You can reach her at Ritu.Kapur@Sohum.org or check out her class schedule at www.SOHUM.org. Illustrations by Jeffrey Longo
You may also access this article through our web-site http://www.lokvani.com/
|
|